
Why Your YubiKey Won’t Work With AWS CLI (and the fix)
Did you know you can use a YubiKey for 2FA when authenticating in AWS CLI or AWS Console? That sounds fairly obvious and expected.
Join me in my surprise then: By default, it won’t do both.
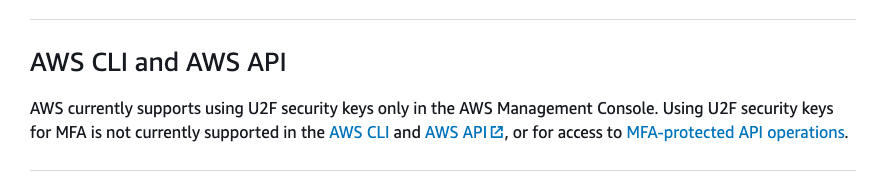
What does that mean exactly? If you use a Yubikey for Universal 2nd Factor authentication (U2F) on your AWS Console, you cannot:
- Build Infrastructure as code with Terraform from your machine
- Run AWS CLI commands
- Use AWS CLI Commands via Python libraries
- Use AWS API Commands from your terminal
Say it ain’t so, AWS
When I first encountered this problem, I asked myself two questions: “Can I set my key to OTP instead?” and “Can I configure one 2FA for the Console and another for CLI?”.
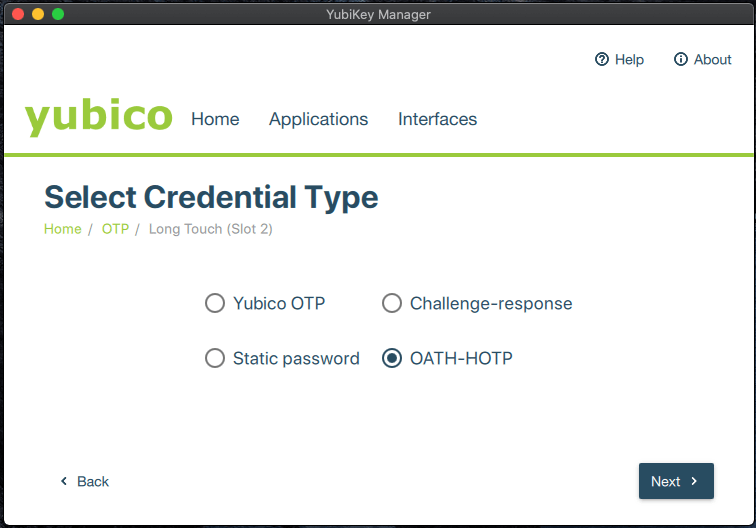
The answer: Only one two-factor authentication is allowed at a time, and the YubiKey Manager program seems to only offer OATH-HOTP, a flavor which AWS will not accept.
You can have any OATH you like, so long as it’s HOTP
The solution: We need a way to do OATH-TOTP, which is time based. That’s because AWS will accept that version of OATH and it can be used across the CLI, API, and Console. A YubiKey doesn’t have a watch, or any way to keep time. Oh, but our computer sure does… Let’s see what libraries and tools Yubico has to offer.
“Default: TOTP? Don’t mind if we do!”
There’s a CLI version of the YubiKey Manager dubbed ykman that supports our TOTP needs. Let’s start by getting that installed on a macOS (you may need to connect some dots for other systems, but the process is the same).
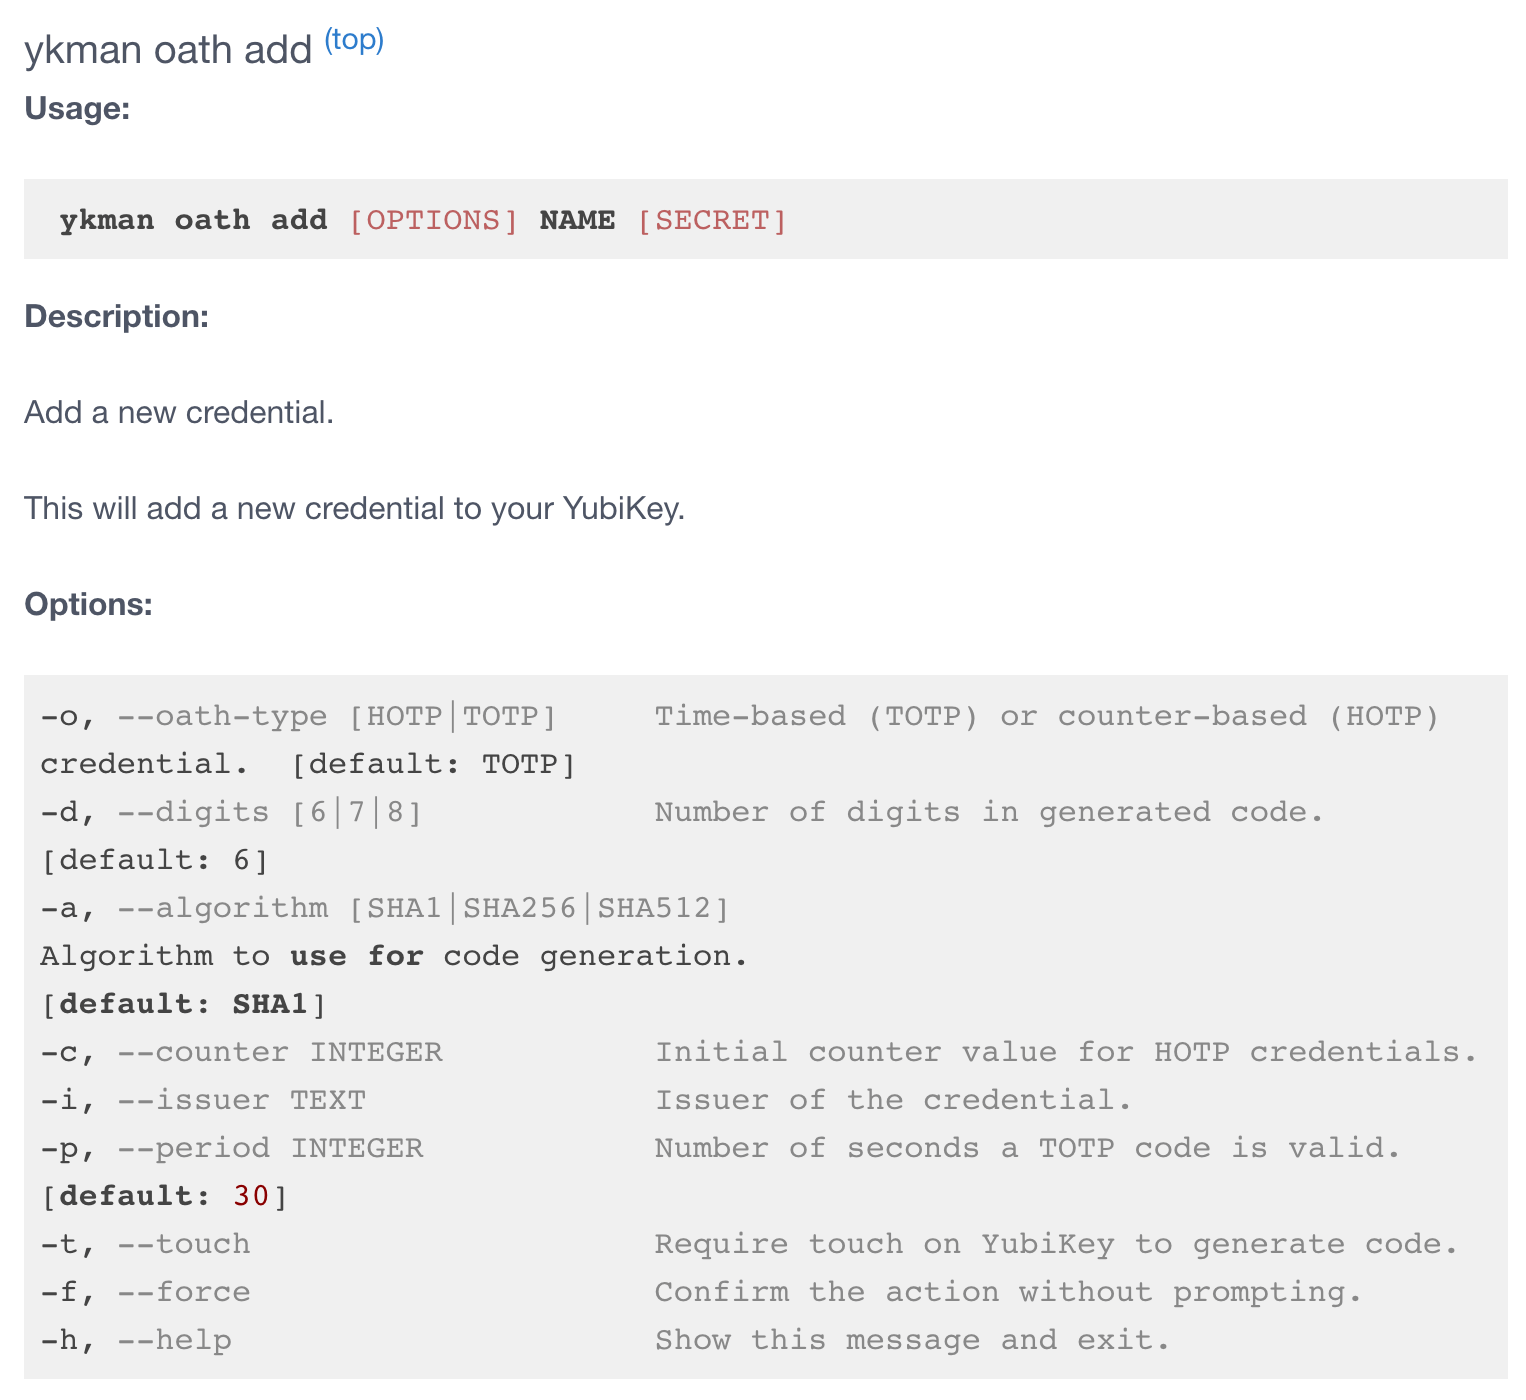
YubiKey Manager CLI (ykman) User Manual (click image for link)
1. Get the YubiKey Manager CLI
Pip
pip install yubikey-manager
macOS
brew install ykman
Ubuntu
sudo apt-add-repository ppa:yubico/stable
sudo apt update
sudo apt install yubikey-manager
Windows
The command line tool is installed alongside the GUI version.
Now, keep the terminal window open because we’re going to need it for the next series of steps. It’s going to be similar to adding a phone based authenticator (as I’m certain you have done before).
You’ll recall that a YubiKey does not have a watch, and we know it certainly does not have a camera to read QR codes, but let’s make it work anyway!
2. Log into the AWS Console, click your username in the upper right, and then click “My Security Credentials” from the dropdown menu
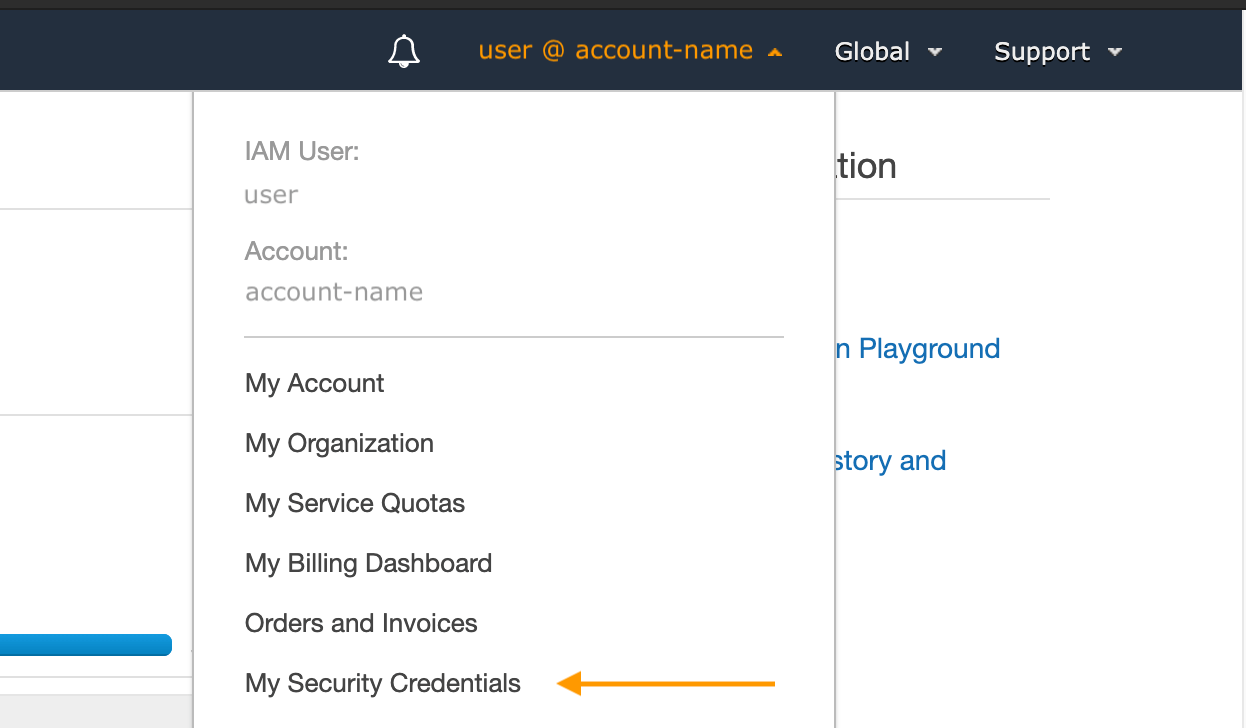
Truly, a point and click adventure in Security
3. Scroll down and click either “Manage MFA device” or “Assign MFA device”
If you’ve already assigned an MFA device, like a YubiKey in U2F mode, you’ll need to remove it and then click “Assign MFA device”.
4. Do not be tempted
You’ll see the word “YubiKey” under the second option, but don’t do it. You need the first option, “Virtual MFA device.”
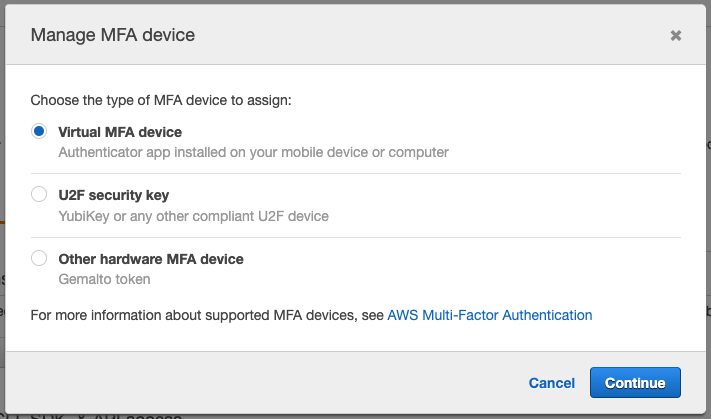
You have chosen...wisely
5. Show the secret
Some may think the only way to use a Virtual MFA device is to scan a QR code with a phone camera, but a QR code is just a secret key in QR format.
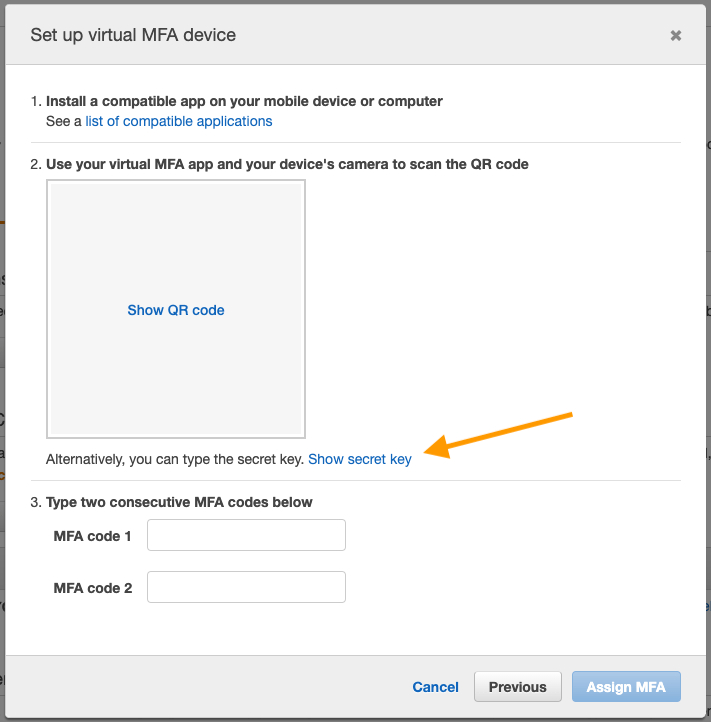
It’s a secret to everybody
Since a YubiKey doesn’t have the ability to snap-up QR codes like a phone camera, we’re going to go the code route. Show the code, and copy it. Again, leave the AWS console window open too!
6. Back to your terminal window!
Back on your terminal window, you’ll want to use the following command (but with your own information as described below):
ykman oath add -t <LABEL> <SECRET_KEY>
<LABEL> can be any word or name you wish, without spacing. We’ll use it to call for tokens from now on.
<SECRET_KEY> is the secret key listed below the QR code in the AWS Console that you just copied. Paste your secret key here.
oath specifies that we want to set up a one time password. By default, it’s time based and 6 digits, but that can be modified if you review the ykman manual.
-t specifies that we want to require a “tap” each time a code is requested. This is a security measure and should be enabled to ensure a malicious process cannot generate codes without your approval.
7. You added the -t on there, right?
Without the -t for ‘tap’, a process could generate codes without the need for a physical button tap, and that’s really not a best practice.
8. Generate two consecutive unique codes to finish assigning the MFA in AWS
Use the following command:
ykman oath code <LABEL>
Your terminal will prompt you to tap your now flashing YubiKey, and once you do so a six-digit code will print out in your terminal. Copy and paste your code into the AWS Console’s “MFA code 1” box.
Now you’ll need to issue that same token-generating command a few times (consider using the up arrow) until you get a second, different code. Remember these are time based codes, so you may need to issue the command a few times in a row as time passes while watching for the change in codes. Once you have your second unique code, paste it into the “MFA code 2” box and click “Assign MFA”.

Last hurdle!
9. All done! Now what?
So your MFA is assigned! This means you now have a programmatic way of generating time based tokens. These tokens will work in the AWS CLI, API, and Console. This allows for the use of Terraform, automation, scripting, assuming AWS roles, and a way to get 2FA tokens without ever touching a phone.
To use the AWS CLI you’ll need to take note of the ARN of your virtual MFA that represents your YubiKey. It’s located in the AWS console under My Security Credentials where we previously clicked “Assign MFA device”. The ARN is formatted like this:
arn:aws:iam::123456789012:mfa/NAME
To issue an STS get token command on the AWS CLI, use:
aws sts get-session-token --serial-number <ARN> --token-code <OATH>
<ARN> is the virtual MFA’s ARN from the AWS Console.
<OATH> is a fresh 6 digit token code.
Remember to use the following to generate a time sensitive code:
ykman oath code <LABEL>
The command should get a reply containing Access and Secret keys as well as a session token. The values should be exported to environmental variables. Place each of the values on the right side of each assignment below, then execute the commands.
export AWS_ACCESS_KEY_ID=
export AWS_SECRET_ACCESS_KEY=
export AWS_SESSION_TOKEN=
export AWS_DEFAULT_REGION=
To quickly recap: We passed AWS a 2FA token with our new system using the sts get-session-token command. In reply we received access keys and a session token. We then set these temporary values to variables in our terminal environment. We can now assume a role, given we have the permissions to do so of course, with this:
aws sts assume-role --role-arn
"arn:aws:iam::123456789012:role/acct" --role-session-name <ANY-
NAME> --serial-number <ARN> --token-code <OATH>
After --role-arn replace the example ARN, keeping the quotes, with your own role ARN.
<ANY-NAME> is a name you create to represent this particular assume session.
<ARN> is the MFA’s ARN from the AWS Console. It will again be formatted like this:
arn:aws:iam::123456789012:mfa/NAME
<OATH> is a fresh 6 digit code generated by the same “ykman oath code label” command.
You’ll need to set the values from this reply back into environmental variables just as you did before:
export AWS_ACCESS_KEY_ID=
export AWS_SECRET_ACCESS_KEY=
export AWS_SESSION_TOKEN=
export AWS_DEFAULT_REGION=
Once you have set the keys and token to environmental variables, you will be able to issue AWS CLI commands!
10. This is a lot of typing…
Consider creating shortcuts, like a function in your zsh or Bash profile to automate the steps above.
For example, here’s a simple function to copy an OATH token directly into your clipboard each time you type ‘mfa’ in terminal:
function mfa () {
    ykprofile=<LABEL>
    key=$(ykman oath code $ykprofile)
    echo $key | awk -F"$ykprofile " '{print $2}' | pbcopy
    key=""
}
<LABEL> is the same label name we’ve been referencing for tokens.
Example output:
username@Name-MacBook-Pro ~ % mfa
Touch your YubiKey...
username@Name-MacBook-Pro ~ %
You can now simply paste using keyboard commands, or right click context, to paste the new OATH code to any window or terminal.
One (Yubi)Key to Rule Them All
Using hardware based authentication is a great idea. And while I would like to be using U2F across all of AWS, it’s not an option yet. In the mean-time, at least the steps above can give you something faster than a phone and more flexible than U2F in AWS.
Hopefully this was helpful and will allow you to practice new skills or ideas via the API and CLI (Local Terraform anyone?) all while maintaining fast and simple 2FA security.
If you found this interesting, or maybe you learned something, do someone a favor and share it with them!
Cheers,
-John