
Practical Attribute-Based Access Control with AWS
Attribute-based access control (ABAC) is an increasingly commonplace authorization model that makes fine-grained access decisions based on “attributes” instead of the more traditional approach of using roles (RBAC).
Instead of assigning permissions directly to users or their roles/groups, the ABAC approach allows or denies access based on metadata (“tags” in AWS parlance) attached to the principals and resources involved in each request.
Attribute-based access control can drastically reduce the workload for your security and operations teams by allowing you to write fewer IAM policies with finer-grained permissions.
In this post, we’ll explore how ABAC works, why you might want to use it instead of role-based permissions in your organization, and walk through some practical examples, including how to bring in attributes from external identity providers via SSO integration and AWS Cognito.
Tags: Not Just for Resources Any More
Most AWS customers are familiar with resource tagging - the ability to attach metadata to resources like S3 buckets and EC2 instances in the form of arbitrary key/value pairs. Tagging resources simplifies infrastructure management automation and helps identify and categorize resources for billing, compliance, and other purposes.
Principal Tags and Request Tags and Session Tags, Oh My
When you perform an operation via the AWS console, or an API, or the CLI, you’re sending a request. Requests contain Principals, Actions, and Resources - respectively, the subject, verb, and object. They usually provide some additional context as well.
IAM entities like users and roles are also taggable resources, which means that you can apply tags to the principal part of the request. Along with resource tags, principal tags are available in the request context when authorization decisions are made.
When you assume an IAM role with STS or federate identity from an external Identity Provider (IdP) via SAML or OIDC, you can also attach tags to the temporary session that’s created. Those tags are available in the request context as principal tags and can be used for authorization decisions.
So, we have metadata about not only the objects of an authorization request but also about the principals involved and the context in which the request was made. With this information, you can write IAM policies that allow or deny requests by using policy Conditions that compare the attached metadata of a principal in a request and a target resource.
Why would you want to do this? Why take an attribute-based approach instead of just creating roles and groups and assigning policies to them?
Scalability - Fewer Policies to Manage
Perhaps the most obvious reason to use ABAC is that it means you can write far fewer policies to achieve the same goals, which can make it easier for your teams to scale.
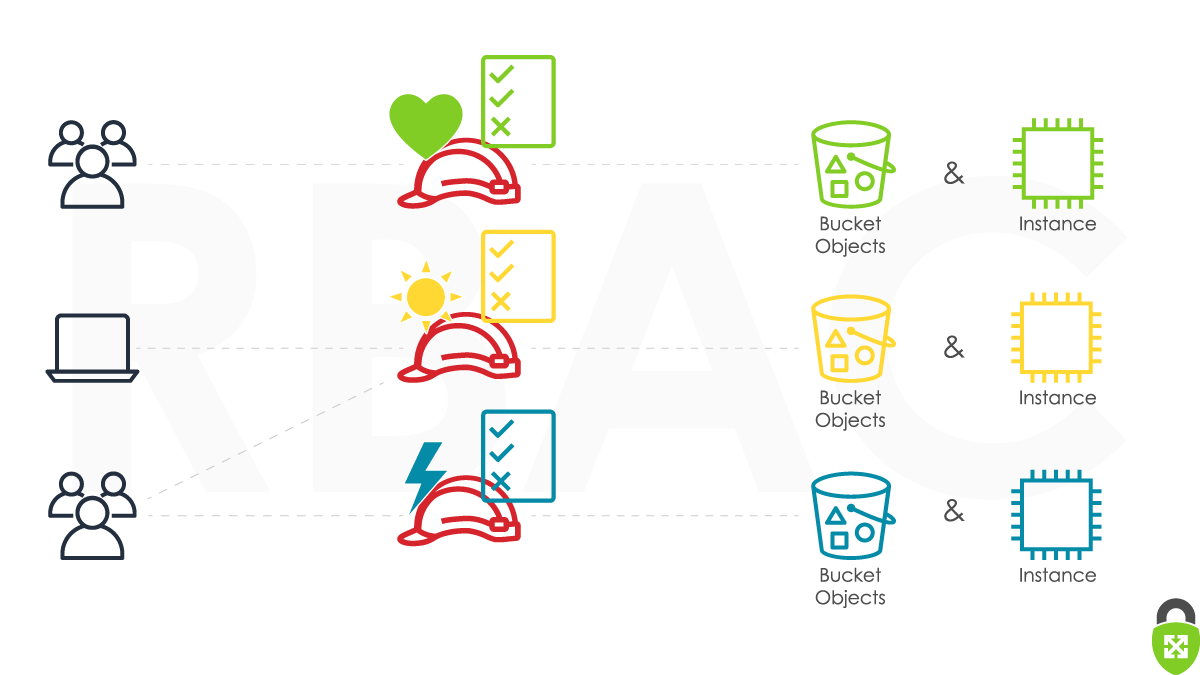
Suppose you have three development teams, and each team is responsible for managing its own set of EC2 instances. Your company has a policy that says that all EC2 instances must be tagged for billing purposes, so your EC2 instances already have DevTeam resource tags attached, like DevTeam: team1, etc.
Each team should only have permission to start and stop their own instances, but everyone should be able to describe the instances owned by any team.
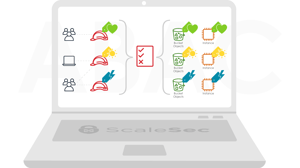
RBAC Approach
Role-Based Access Control
A typical approach, which already uses resource tags, would be to create an IAM group for each team (or a role for federated identities) and then attach a policy that grants access to the team’s tagged resources with a Condition like so:
{
  "Version": "2012-10-17",
  "Statement": [
    {
      "Effect": "Allow",
      "Action": ["ec2:DescribeInstances"],
      "Resource": "*"
    },
    {
      "Effect": "Allow",
      "Action": ["ec2:StartInstances", "ec2:StopInstances"],
      "Resource": "*",
      "Condition": {
        "StringEquals": {
          "ec2:ResourceTag/DevTeam": "team1"
        }
      }
    }
  ]
}
Note the “Condition” statement in the second block - this restricts the StartInstances and StopInstances actions to resources that have the DevTeam: team1 tag attached. If you attach this policy to team1’s IAM group, they will be restricted to appropriately tagged EC2 resources. You can create similar policies for the other dev teams.
The downside to this approach is that it requires you to create and manage an IAM policy for each development team. That’s not a significant administrative burden for three teams, but what happens when you need to scale to 50 teams or 5000?
ABAC Approach
Another approach to the problem would be to control access by tagging the principals (users or roles) involved. You can then write a single IAM policy that works for all dev teams, no matter how many, by comparing the principal tags with the resource tags. You can do this by using Principal Tags in the policy condition:
"Condition": {
    "StringEquals": {
        "ec2:ResourceTag/DevTeam": "${aws:PrincipalTag/DevTeam}"
    }
}
This condition evaluates to true if the IAM user’s DevTeam tag matches the DevTeam tag on the resource. With this approach, you only have to write a single IAM policy instead of one for each team. As long as the users and resources are tagged appropriately and the tag values match, access is granted.
Session Tags
Taking tags a step farther - when you use STS to assume an IAM role or federate a user, a temporary session is created. You can attach tags to these sessions that become available as principal tags in the authorization requests they make. STS lets you specify tag values directly as part of the assume-role call, and Cognito and SSO allow you to map attributes from external providers to session tags automatically.
This is an extremely powerful tool because it allows you to securely inject attributes from an existing, external IdP like Active Directory or Auth0 into your IAM sessions, and make fine-grained access decisions based on them.
AWS provides a great tutorial on using SAML assertions for ABAC, which you can find here.
If you’re using Cognito Federated Identities to federate users from an external IdP, AWS has excellent documentation here on using their user attributes for access control. You simply create an IAM role that your federated users assume and then configure what external attributes (SAML assertions or JWT claims) you want to be injected into the session that’s created.
Session tags can even be chained - i.e., if you use an STS session to assume another role (creating a new session in the process, it can inherit the tags from the previous session via a process called role chaining.
Important Considerations
ABAC is a relative newcomer at AWS, and authorization based on tags isn’t supported in all services. You can see what services support tags by checking the table here. Find the row for the service in question and check the “Authorization based on tags” column. You can click on the service name for additional documentation on authorization and access control for that service.
Services that allow resource tags to be used in policy conditions provide detailed service-specific documentation on how tags can be used and in which requests. For example, EC2’s can be found here. The actions table breaks down exactly which condition keys can be used for each action in the API. Be aware that some services only support ABAC on a subset of available API actions.
Limiting Access to Tagging Operations
When your IAM policies make authorization decisions based on resource tags, it’s important to restrict access to how those tags can be created and modified. If you don’t enforce these restrictions, a user could simply grant themselves access to resources by changing or adding resource tags.
Thankfully, these restrictions can easily be accomplished with IAM policy conditions. AWS provides a globally available context key called aws:TagKeys that lets you restrict the tags used in any request.
For example, the following Condition snippet prevents IAM principals from using tags called “project” or “team” in a request unless the values of those tags match the team and project the principal itself is tagged with. i.e., if an IAM user is tagged with team: foo and project: bar, it can only create “team” and “project” resource tags with the same values.
"Condition": {
  "StringEquals": {
    "aws:ResourceTag/access-project": "${aws:PrincipalTag/project}",
    "aws:ResourceTag/access-team": "${aws:PrincipalTag/team}"
  },
  "ForAllValues:StringEquals": {
    "aws:TagKeys": [
      "project",
      "team"
    ]
  },
  "StringEqualsIfExists": {
    "aws:RequestTag/project": "${aws:PrincipalTag/project}",
    "aws:RequestTag/team": "${aws:PrincipalTag/team}"
  }
}
Conclusion
ABAC can be a powerful tool to simplify permissions management, provide fine-grained access control, and help your organization scale quickly because making authorization decisions based on tags often eliminates the need to write new IAM policies. ABAC is a large and complicated subject, and this post only scratches the surface, but hopefully, it’s enough for you to get started if it fits with your goals. A great place to start, with step-by-step instructions and copy/paste-able code is provided by AWS and can be found here.